WattWächter Gas
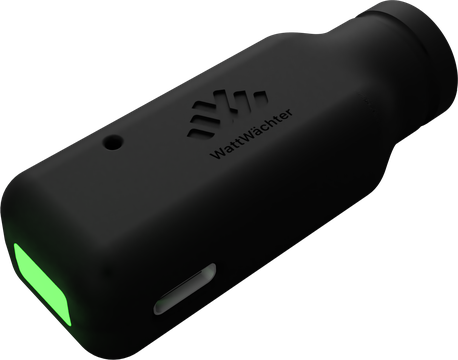
The WattWächter Gas reads your gas meter without contact. It counts the revolutions of the last number wheel and turns them into the meter reading in m³, the current flow rate in m³/h and the energy in kWh. The data is available locally on your home network and through the cloud, just like with the WattWächter Plus.
What can the WattWächter Gas do?
- Meter reading in m³ and current flow rate in m³/h, plus the energy in kWh
- History data — 15-minute resolution (30 days) and daily values (2 years), stored on the device itself
- Updates — firmware updates automatically via the cloud — see Updates
- Consumption and costs based on your tariffs
- Switch devices — turn a Shelly, a Tasmota device or another device on and off over HTTP, by flow rate, amount, time of day or run time (e.g. a warning light when unusually much gas flows) — see Settings → Switch devices
- Locally on your home network: web interface, REST API, MQTT and Modbus TCP — no cloud required
- Cloud: remote access via the Cloud Portal
- Alignment aid: the LED goes dark briefly on every counted revolution; with Magnetic Field the dashboard also shows the field strength
Quick start
Four steps to your meter reading
- Check the variant — does Magnetic Field or Inductive fit your meter? See Supported meters
- Set up Wi-Fi — via the app over Bluetooth or via the device's access point in the browser
- Mount the sensor — where the magnet or the metal marker turns past
- Configure the meter and check — enter medium, meter reading and volume per revolution, then watch whether it counts
Something not working? Troubleshooting starts from the LED colour; questions about counting are answered in the FAQ.
How it works
Gas meter
last number wheel
WattWächter Gas
counts revolutions and stores history
Local on your network
Optional via the cloud
- On every revolution the sensor detects the magnet or the metal marking — the LED goes dark briefly
- From the revolutions and the volume per revolution the device calculates the meter reading (m³) and the flow rate (m³/h), and with calorific value and Z-number also the energy (kWh)
- The data is stored on the device itself — 15-minute values for 30 days, daily values for 2 years
- Served locally via web interface, REST API, MQTT and Modbus TCP — optionally also via the cloud in the cloud portal
Two variants, one way of working
The WattWächter Gas comes with two different sensors. Which one fits your meter is explained under Supported meters.
| WattWächter Gas – Magnetic Field | WattWächter Gas – Inductive | |
|---|---|---|
| Short name | GW-MF | GW-ID |
| Sensor | magnetic field sensor | inductive sensor with three coils |
| Detects | a magnet turning with the number wheel | a metal marker on a pointer wheel or a half-moon disc |
| Typical for | most diaphragm gas meters | diaphragm gas meters with a round interface below the window, e.g. Itron/Pipersberg |
Both variants run the same firmware and are set up and operated in the same way. The web interface shows which variant you have on the start page under "About this device".
-
Magnetic Field (GW-MF)
Coming soon: product photo
Photo: WattWächter Gas – Magnetic Field, cut out, from the front, with sensor and holder.
-
Inductive (GW-ID)
Coming soon: product photo
Photo: WattWächter Gas – Inductive, cut out, from the front, with sensor head.
What you set
After mounting on the meter, the device needs a few details — all in the web interface under Settings → Gas/water meter:
- Medium — gas or water
- Current meter reading — the reading your meter currently shows
- Volume per revolution — printed on the meter, e.g. "1 rev = 0.01 m³"
- the calorific value and Z-number from your gas bill
- Sensitivity (Magnetic Field) or minimum amplitude (Inductive), if the defaults do not fit
Step by step: Setup.
Technical data
| Property | Value |
|---|---|
| Connectivity | Wi-Fi 802.11 b/g/n (2.4 GHz), Bluetooth 5.0 LE |
| Sensor | magnetic field (GW-MF) or inductive with three coils (GW-ID) |
| Mounting | with an adapter on the meter, without breaking the seal |
| Power supply | USB-C, 5 V (min. 500 mA) |
| Storage | 15-min resolution (30 days) + daily values (2 years) |
| Status indicator | one RGB LED (meaning) |
| Function button | to the left of the W logo (functions) |
| Access point during setup | WattWaechter-GW-XXXXXX |
| Hostname | wattwaechter-XXXXXXXXXXXX.local (mDNS) |
Package contents: see Setup → Package contents.
Data collection
| Reading | Unit | OBIS |
|---|---|---|
| Meter reading | m³ | 7-0:3.0.0 |
| Flow rate | m³/h | 7-0:43.0.0 |
| Energy (meter reading × Z-number × calorific value) | kWh | — (in the dashboard, via Modbus and in the cost calculation) |
The codes follow the OBIS system for gas (medium 7) and appear like this in the REST API, in MQTT and in Home Assistant — see also Readings. When you change the medium, the codes change with it.
Same features as the WattWächter Plus
The WattWächter Plus and the WattWächter Gas share the same firmware. Everything not directly related to the meter therefore works the same on both:
- Web interface and settings — in German or English
- LED status, function button and software updates
- REST API, MQTT and Modbus TCP
- Home Assistant and the cloud portal
What is different from the Plus
- The dashboard shows the flow rate instead of power and the meter reading in m³. The third tile shows the energy in kWh.
- There is no feed-in and no IR self-test.
- The settings have the additional section Gas/water meter; the Advanced section (median filter, current transformer ratio) belongs to the electricity meter and is missing.
- Modbus TCP does not provide SunSpec but its own register block from address 41000 — see Modbus TCP.
- Tariffs belong to the selected medium: gas in ct/kWh — see Settings → Tariffs.
- The LED goes dark briefly on every counted revolution. While aligning the sensor on the meter you can see straight away whether it counts.