WattWächter Plus
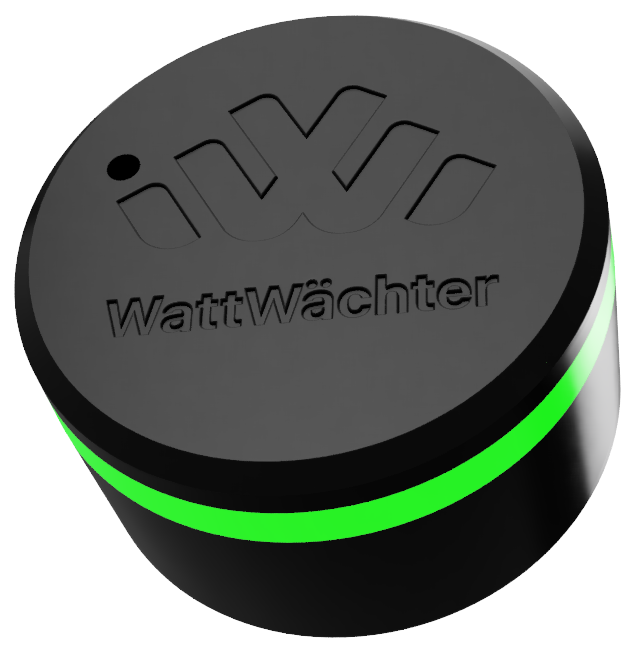
The WattWächter Plus is your smart energy monitor for the electricity meter. It reads your smart meter via an IR reading head and delivers consumption data in real time — locally on your home network or through our cloud portal.
What can the WattWächter do?
- Real-time monitoring — Current power (W) and meter readings (kWh) directly from your smart meter
- History data — 15-minute resolution (30 days) and daily values (2 years), stored on the device itself
- Local web interface — live dashboard, history and all settings in the browser at
wattwaechter-XXXXXXXXXXXX.local, without app or cloud — see Web interface - Local REST API — Full access to all data on your home network via
wattwaechter-XXXXXXXXXXXX.local— see REST API - Cloud portal — Dashboard at login.wattwächter.de with remote access — see Cloud Portal
- Switch devices — Turn a Shelly, a Tasmota device or another device on and off over HTTP, by readings, time of day or run time (e.g. a heating element when there is surplus power) — see Settings → Switch devices
- Connect home batteries — the Plus answers like an EcoTracker or a Shelly Pro 3EM, so storage systems and inverters (e.g. EcoFlow STREAM, Growatt NOAH, Hoymiles, Marstek) read the power directly from it — see Settings → Emulation
- MQTT integration — Connect to Home Assistant, ioBroker, and other smart home systems
- OTA updates — Firmware updates automatically via the cloud — see Updates
- RGB status LED — Device status at a glance — see LED & button
- WiFi & Bluetooth 5.0 — Wireless connection to your home network and easy setup via the app
Quick start
Four steps to your first reading
- Check compatibility — See whether your meter is supported
- Prepare the meter — Unlock your electricity meter with the PIN from your grid operator
- Setup — Attach the reading head, connect USB-C, set up Wi-Fi via the app or the browser
- Cloud connection (optional) — Remote access via the app and the Cloud Portal
Something not working? Troubleshooting starts from the LED colour; answers to common questions are in the FAQ.
How it works
Electricity meter
optical interface
WattWächter Plus
reads and stores history
Local on your network
Optional via the cloud
- The WattWächter receives SML telegrams from the smart meter
- The WattWächter parses OBIS codes (e.g.,
1-0:1.8.0for total consumption) - The data is stored on the device itself — 15-minute values for 30 days, daily values for 2 years
- Served locally via web interface, REST API, MQTT and Modbus TCP — optionally also via the cloud in the app and cloud portal
Specifications
| Property | Value |
|---|---|
| Connectivity | WiFi 802.11 b/g/n, Bluetooth 5.0 LE |
| Interface | IR reading head (SML/OBIS protocol, D0 interface) |
| Power supply | USB-C, 5V (min. 500mA) |
| Storage | 15-min resolution (30 days) + daily values (2 years) |
| Status indicator | two RGB LEDs that always show the same colour (meaning) |
| Function button | top left above the WattWächter logo (functions) |
| Hostname | wattwaechter-XXXXXXXXXXXX.local (mDNS) |
Data collection
OBIS codes
The following OBIS codes are provided by nearly all modern meters after unlocking:
| OBIS Code | Description | Unit |
|---|---|---|
1-0:1.8.0 |
Total consumption (import) | kWh |
1-0:2.8.0 |
Total feed-in (export) | kWh |
1-0:16.7.0 |
Current power | W |
→ Tariffs, voltage, current, power, phase angles and device information: Additional OBIS codes.
Plus only
The Plus can do a lot more than the WattWächter Tasmota and the WattWächter TTL — much of what you have to set up or program yourself there is ready to go here:
- Meters are detected automatically — no Tasmota script and no reading program of your own, including NES/Echelon meters (C12.18)
- Setup via the app over Bluetooth, plus the WattWächter app and the optional cloud portal
- History data on the device — 15-minute values (30 days) and daily values (2 years), without Home Assistant or ThingSpeak
- Web interface, REST API and Modbus TCP with SunSpec registers
- Official Home Assistant integration and encrypted MQTT, also with your own CA certificate
- Fine-tuning under Settings → Meter (NES meter password) and Settings → Advanced (median filter, CT ratio), plus the IR self-test in the web interface
All differences at a glance: Which device fits? → The differences in detail.