Mounting with the Itron adapter
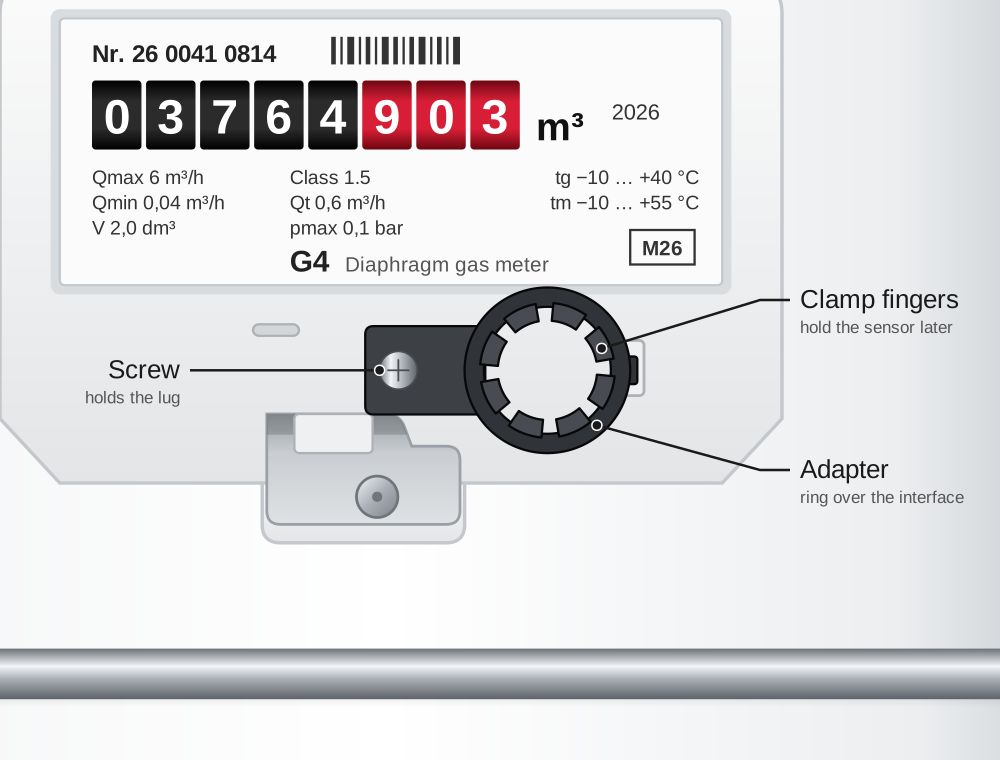
This guide applies to the WattWächter Gas – Inductive (GW-ID) on a diaphragm gas meter with a round interface below the window — see Supported meters. The Itron adapter holds the sensor there: a ring with clamp fingers and a lug that is screwed to the meter.
For other meters see Meter preparation.
What you need
- WattWächter Gas – Inductive
- Itron adapter
- Screw
- Phillips screwdriver
The Itron adapter and the screw come with the WattWächter Gas – Inductive.
Guide for printing
The same steps are available as an illustrated guide without text for printing: Mounting guide as PDF.
Step by step
-
Screw on the adapter. Hold the adapter against the meter so that the ring sits over the round interface below the window and the lug points to the left. Fix the lug to the meter with the screw.
-
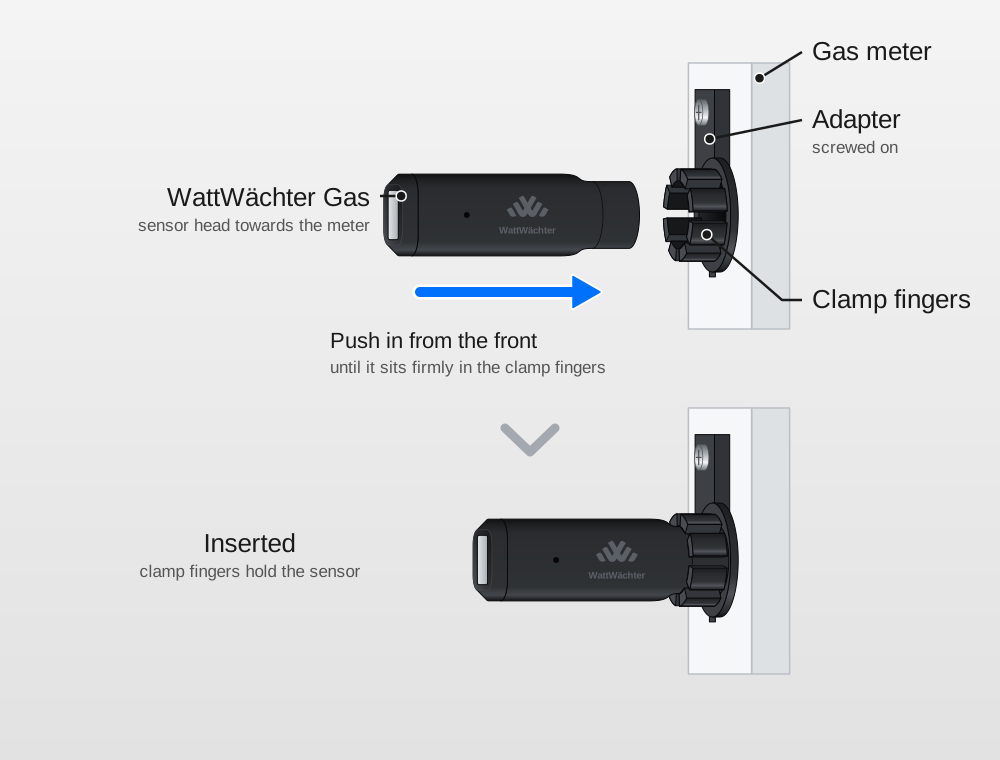
Insert the sensor. Push the sensor, sensor head first, into the ring from the front until it sits firmly in the clamp fingers. It then sticks out horizontally from the meter.
-
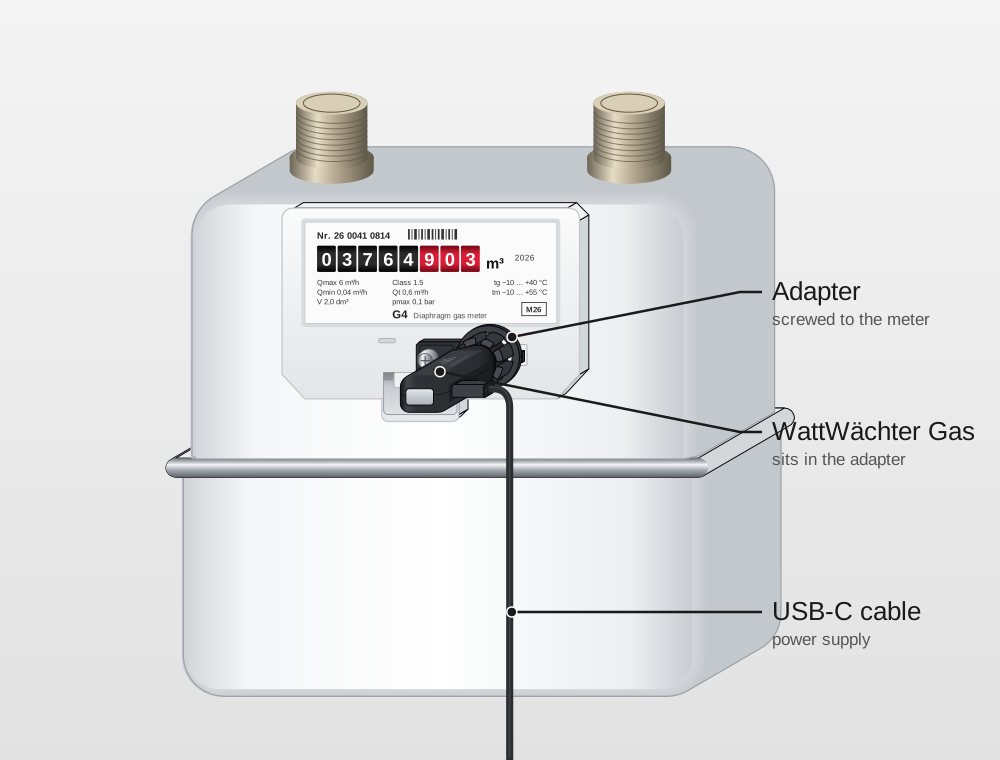
Connect the USB-C cable. The sensor now sits in front of the interface.
Do not rotate the sensor once the meter reading is entered
The sensor can be rotated in the adapter — that is normal. Once you have entered the meter reading, do not rotate it any more — otherwise the reading is off afterwards and you have to correct it.
Check whether the sensor sits correctly during setup in step 6.